If you’re a coffee lover but don’t have a dedicated coffee grinder at home, you might be wondering whether your Ninja blender can do the job of grinding coffee beans. While Ninja blenders are highly versatile kitchen tools, known for blending smoothies, soups, and crushing ice, the question is whether they can handle the precision of grinding coffee beans effectively. The short answer is: yes, you can grind coffee beans in a Ninja blender, but there are some nuances and best practices to ensure you get the best results.

In this blog post, we’ll discuss everything you need to know about using a Ninja blender to grind coffee beans, including step-by-step instructions, the pros and cons, and helpful tips To enhance your grinding experience to its fullest potential. We will also tackle common FAQs about this method and how it compares to a traditional coffee grinder.
Why Grind Coffee Beans?
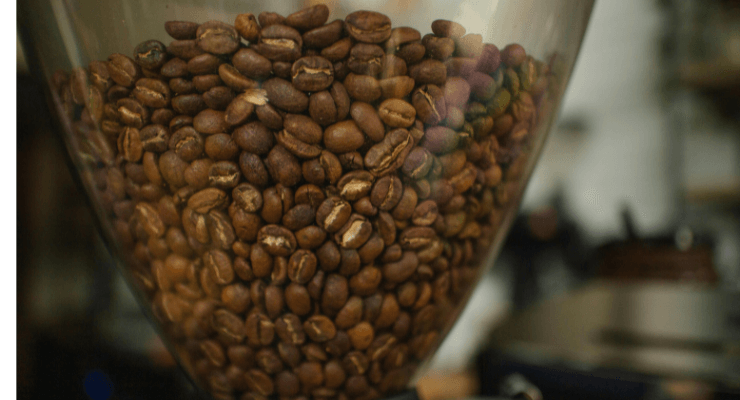
Grinding coffee beans just before brewing helps to preserve their flavor and aroma. Pre-ground coffee tends to lose its freshness more quickly because the exposure to oxygen accelerates the degradation of the beans’ oils, which are essential for a rich coffee flavor.
When you grind your own beans, you have more control over the grind size, which plays a significant role in the taste of your coffee. A finer grind is perfect for espresso machines, while a coarser grind works best for a French press.
Is it possible to grind coffee beans with a Ninja blender
Yes, Ninja blenders can grind coffee beans. However, they won’t offer the same level of control and consistency as a burr grinder, which is specially designed for coffee grinding. Ninja blenders have powerful blades that can handle tough ingredients, including coffee beans. The process is fairly quick, and with the right technique, you can achieve an acceptable grind for various brewing methods like drip coffee, pour-over, or even French press.
However, achieving the perfect grind consistency can be a bit tricky, especially when compared to a grinder specifically designed for coffee beans.
Steps to Grind Coffee Beans in a Ninja Blender
Follow these simple steps to grind coffee beans in your Ninja blender and enjoy freshly brewed coffee without needing a coffee grinder.
Step 1: Measure the Coffee Beans
Start by measuring the amount of coffee you want to grind. Typically, 1 tablespoon of whole beans will yield around 1 tablespoon of ground coffee. Depending on how many cups of coffee you want to brew, you can adjust the quantity.
Step 2: Place the coffee beans into the blend
Pour your coffee beans into the Ninja blender. Use the smaller jar attachment if your Ninja blender has multiple jar options, as it helps achieve a more even grind. Don’t fill the jar more than halfway to give the beans space to move around freely.
Step 3: Pulse the Blender
Rather than blending continuously, opt for the ‘Pulse’ feature. Pulsing helps control the grind size and prevents the beans from overheating, which can affect their flavor. For a coarse grind, pulse the blender 8–10 times in short bursts, about 2–3 seconds each time. For a finer grind, pulse for 12–15 times, pausing in between pulses to check the texture.
Step 4: Check the Grind Consistency
After pulsing, check the grind size by shaking the jar and inspecting the coffee grounds. You’re looking for a uniform consistency that matches the brewing method you’re using:
– Coarse grind: For French press or cold brew.
– Medium grind: Perfectly suited for drip coffee machines.
– Fine grind: Suitable for espresso.
If needed, pulse a few more times to achieve your desired grind size.
Step 5: Clean the Blender
Once you’ve ground the coffee beans, be sure to clean your Ninja blender thoroughly. Coffee beans leave behind oils that can affect the taste of other foods you blend in the future. Take apart the blender and clean all components using warm, soapy water.

Pros and Cons of Grinding Coffee Beans in a Ninja Blender
Pros:
1. Convenience: If you already own a Ninja blender, there’s no need to purchase a separate coffee grinder.
2. Time-saving: Ninja blenders are powerful enough to grind coffee beans quickly.
3. Multi-purpose tool: The Ninja blender can be used for a variety of kitchen tasks, making it a versatile appliance.
Cons:
1. Inconsistent grind size: While you can grind coffee beans, the grind consistency may not be as uniform as with a burr grinder.
2. Potential overheating: Continuous blending can heat the beans, affecting their flavor. Pulsing minimizes this risk.
3. Blender blade wear: Regularly grinding hard substances like coffee beans may dull the blades over time.
Guidelines for Grinding Coffee Beans with a Ninja Blender.
– Use the pulse function: This gives you better control over the grind size, preventing overprocessing.
– Don’t overfill the blender: Grinding in smaller batches will yield more even results.
– Avoid running the blender too long: Overheating the beans can result in a burnt taste, so stick to short pulses.
How to Choose the Right Grind Size for Your Brewing Method
The size of your coffee grounds directly affects the flavor of your coffee. Here’s a guide to match the grind size with your preferred brewing method:
– Coarse grind: Large chunks of beans, best for French press or cold brew, where longer steeping times require a slow extraction.
– Medium grind: Slightly finer than coarse, ideal for drip coffee makers and pour-over methods. This grind size offers the greatest versatility.
– Fine grind: A powdery consistency suitable for espresso or Turkish coffee, where fast extraction is needed.
Conclusion
Absolutely, coffee beans can be ground in a Ninja blender! While it may not provide the same consistency as a dedicated coffee grinder, a Ninja blender can certainly get the job done when you’re in a pinch. By using the pulse function and checking the grind size frequently, you can achieve a grind that suits your brewing method. Just be sure to clean the blender well afterward, and keep an eye on the blade’s sharpness if you grind coffee beans regularly.
If you’re serious about coffee and want the most consistent results, investing in a burr grinder might be worthwhile in the long run. But for occasional coffee drinkers or those looking for a quick solution, the Ninja blender offers a convenient and effective way to grind your coffee beans. Enjoy your fresh, flavorful brew!
FAQs About Grinding Coffee Beans in a Ninja Blender
1. Will grinding coffee beans in a Ninja blender damage the blades?
Ninja blenders have strong, durable blades that are designed to handle tough ingredients like ice, nuts, and seeds, so coffee beans should not cause significant damage. However, regular grinding of hard items may wear out the blades over time, so it’s a good idea to check their sharpness periodically.
2. How long should I pulse the blender to grind coffee beans?
Start with short pulses, around 2-3 seconds each. For a coarse grind, pulse 8–10 times, and for a finer grind, pulse 12–15 times. Be sure to pause between pulses to check the consistency.
3. Can I grind coffee beans for espresso in a Ninja blender?
While a Ninja blender can produce a fine grind, it may not be as consistent as a burr grinder. For espresso, consistency is crucial to achieve the best extraction. If you’re an espresso enthusiast, you might want to invest in a dedicated coffee grinder.
4. Can I grind other ingredients in a Ninja blender after grinding coffee beans?
Yes, but it’s essential to clean the blender thoroughly after grinding coffee beans. Coffee oils can linger in the blender and may affect the flavor of other ingredients, especially in smoothies or other beverages.
5. What’s the best alternative if I don’t have a Ninja blender or a coffee grinder?
If you don’t have a Ninja blender or a coffee grinder, you can use a food processor, mortar and pestle, or even a rolling pin to crush the beans. While these methods are less efficient, they can still work in a pinch.
As an Amazon Associate, I earn from qualifying purchases.


